This page was created by Carson Riggs. The last update was by The Dartmouth College Digital Scriptorium.
Conservation of Rauner 003203
Thanks to Deborah Howe, Greg Elder, and Jeff Georgantes for the information and images in this section!
In 2017, Rauner 003203 underwent conservation. An initial inspection of the antiphoner revealed clear evidence of water damage and mold growth. At the time of examination, the mold had dried and was found on every page. Using a HEPA (High-Efficiency Particulate Air) vacuum, each page was cleaned to remove the inert mold.
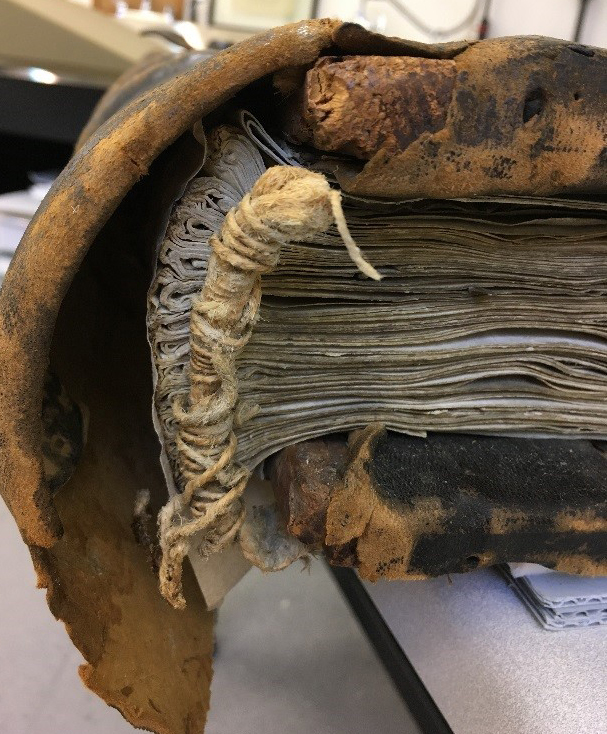
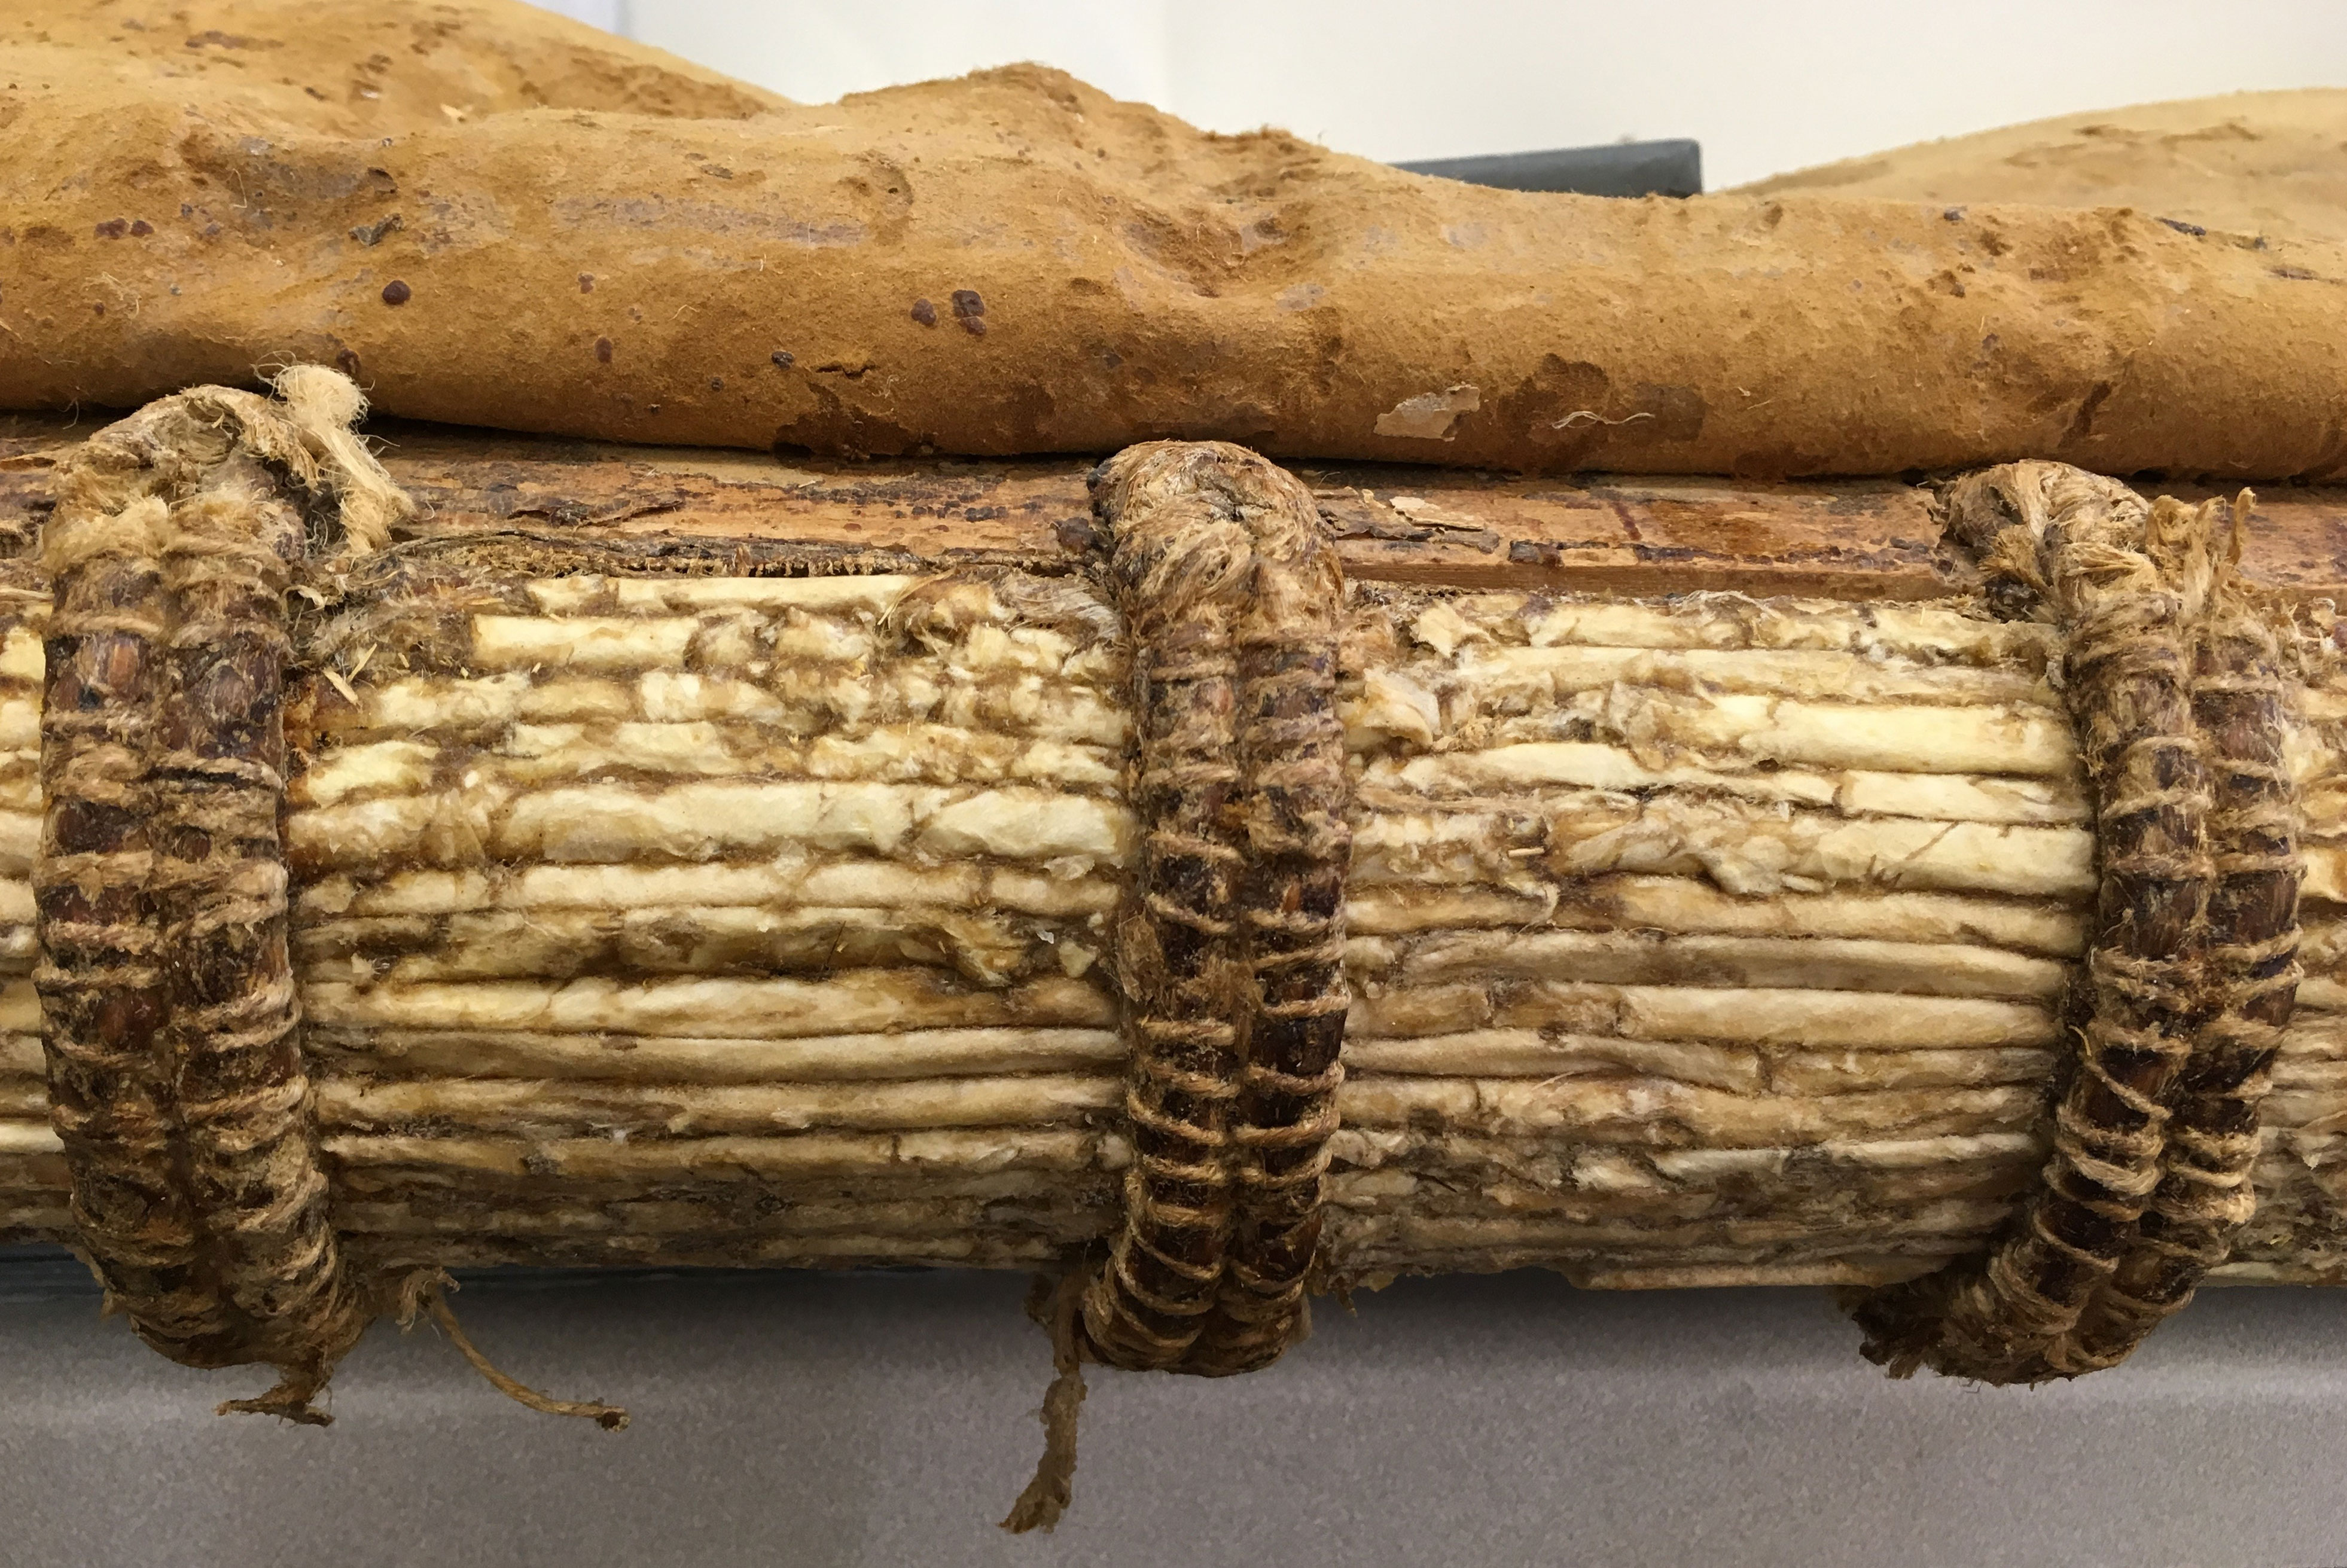
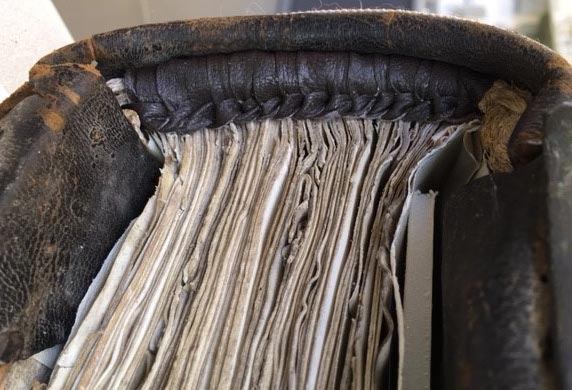
Although the original endbands at the head and tail of the spine were still attached to the wooden boards, the sewing was loose and no longer serving its purpose.
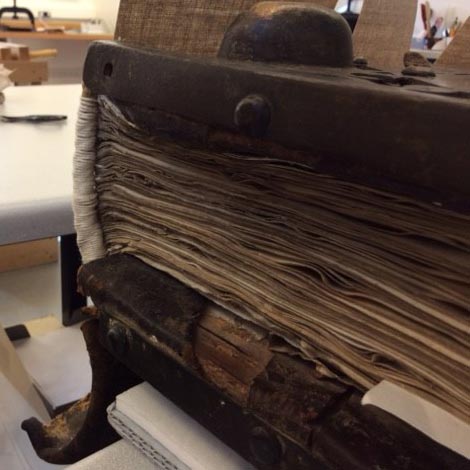
In general, the sewing of the text block was in stable condition. Only the last few quires had become loose.
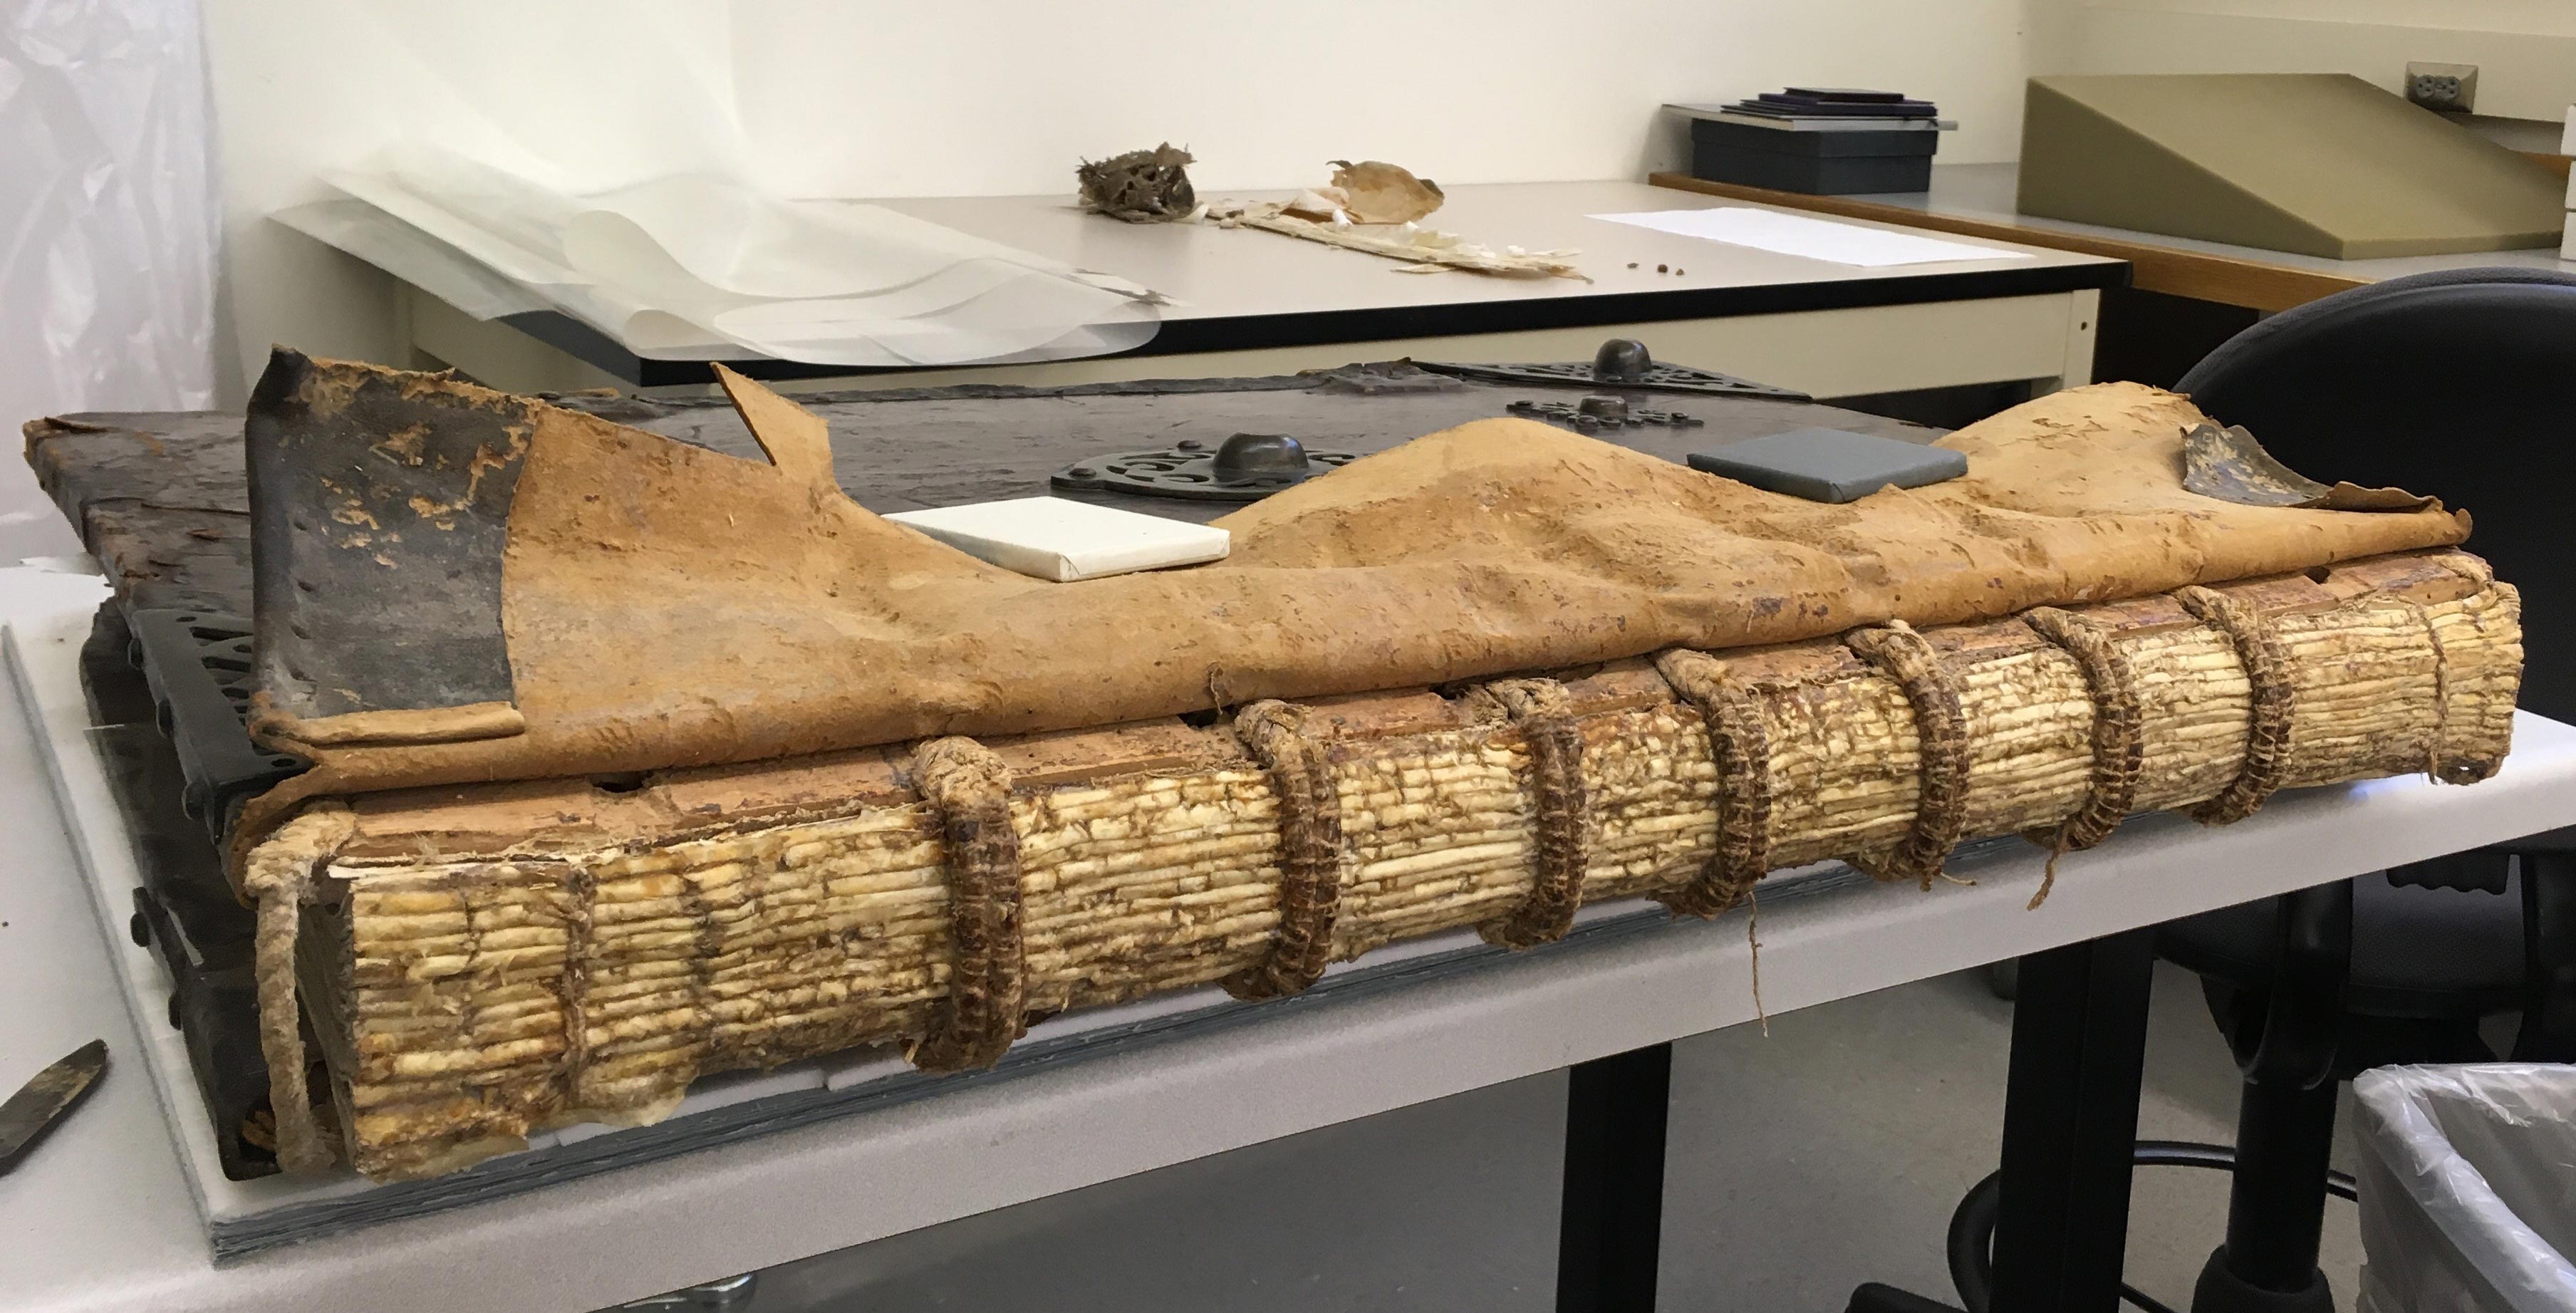
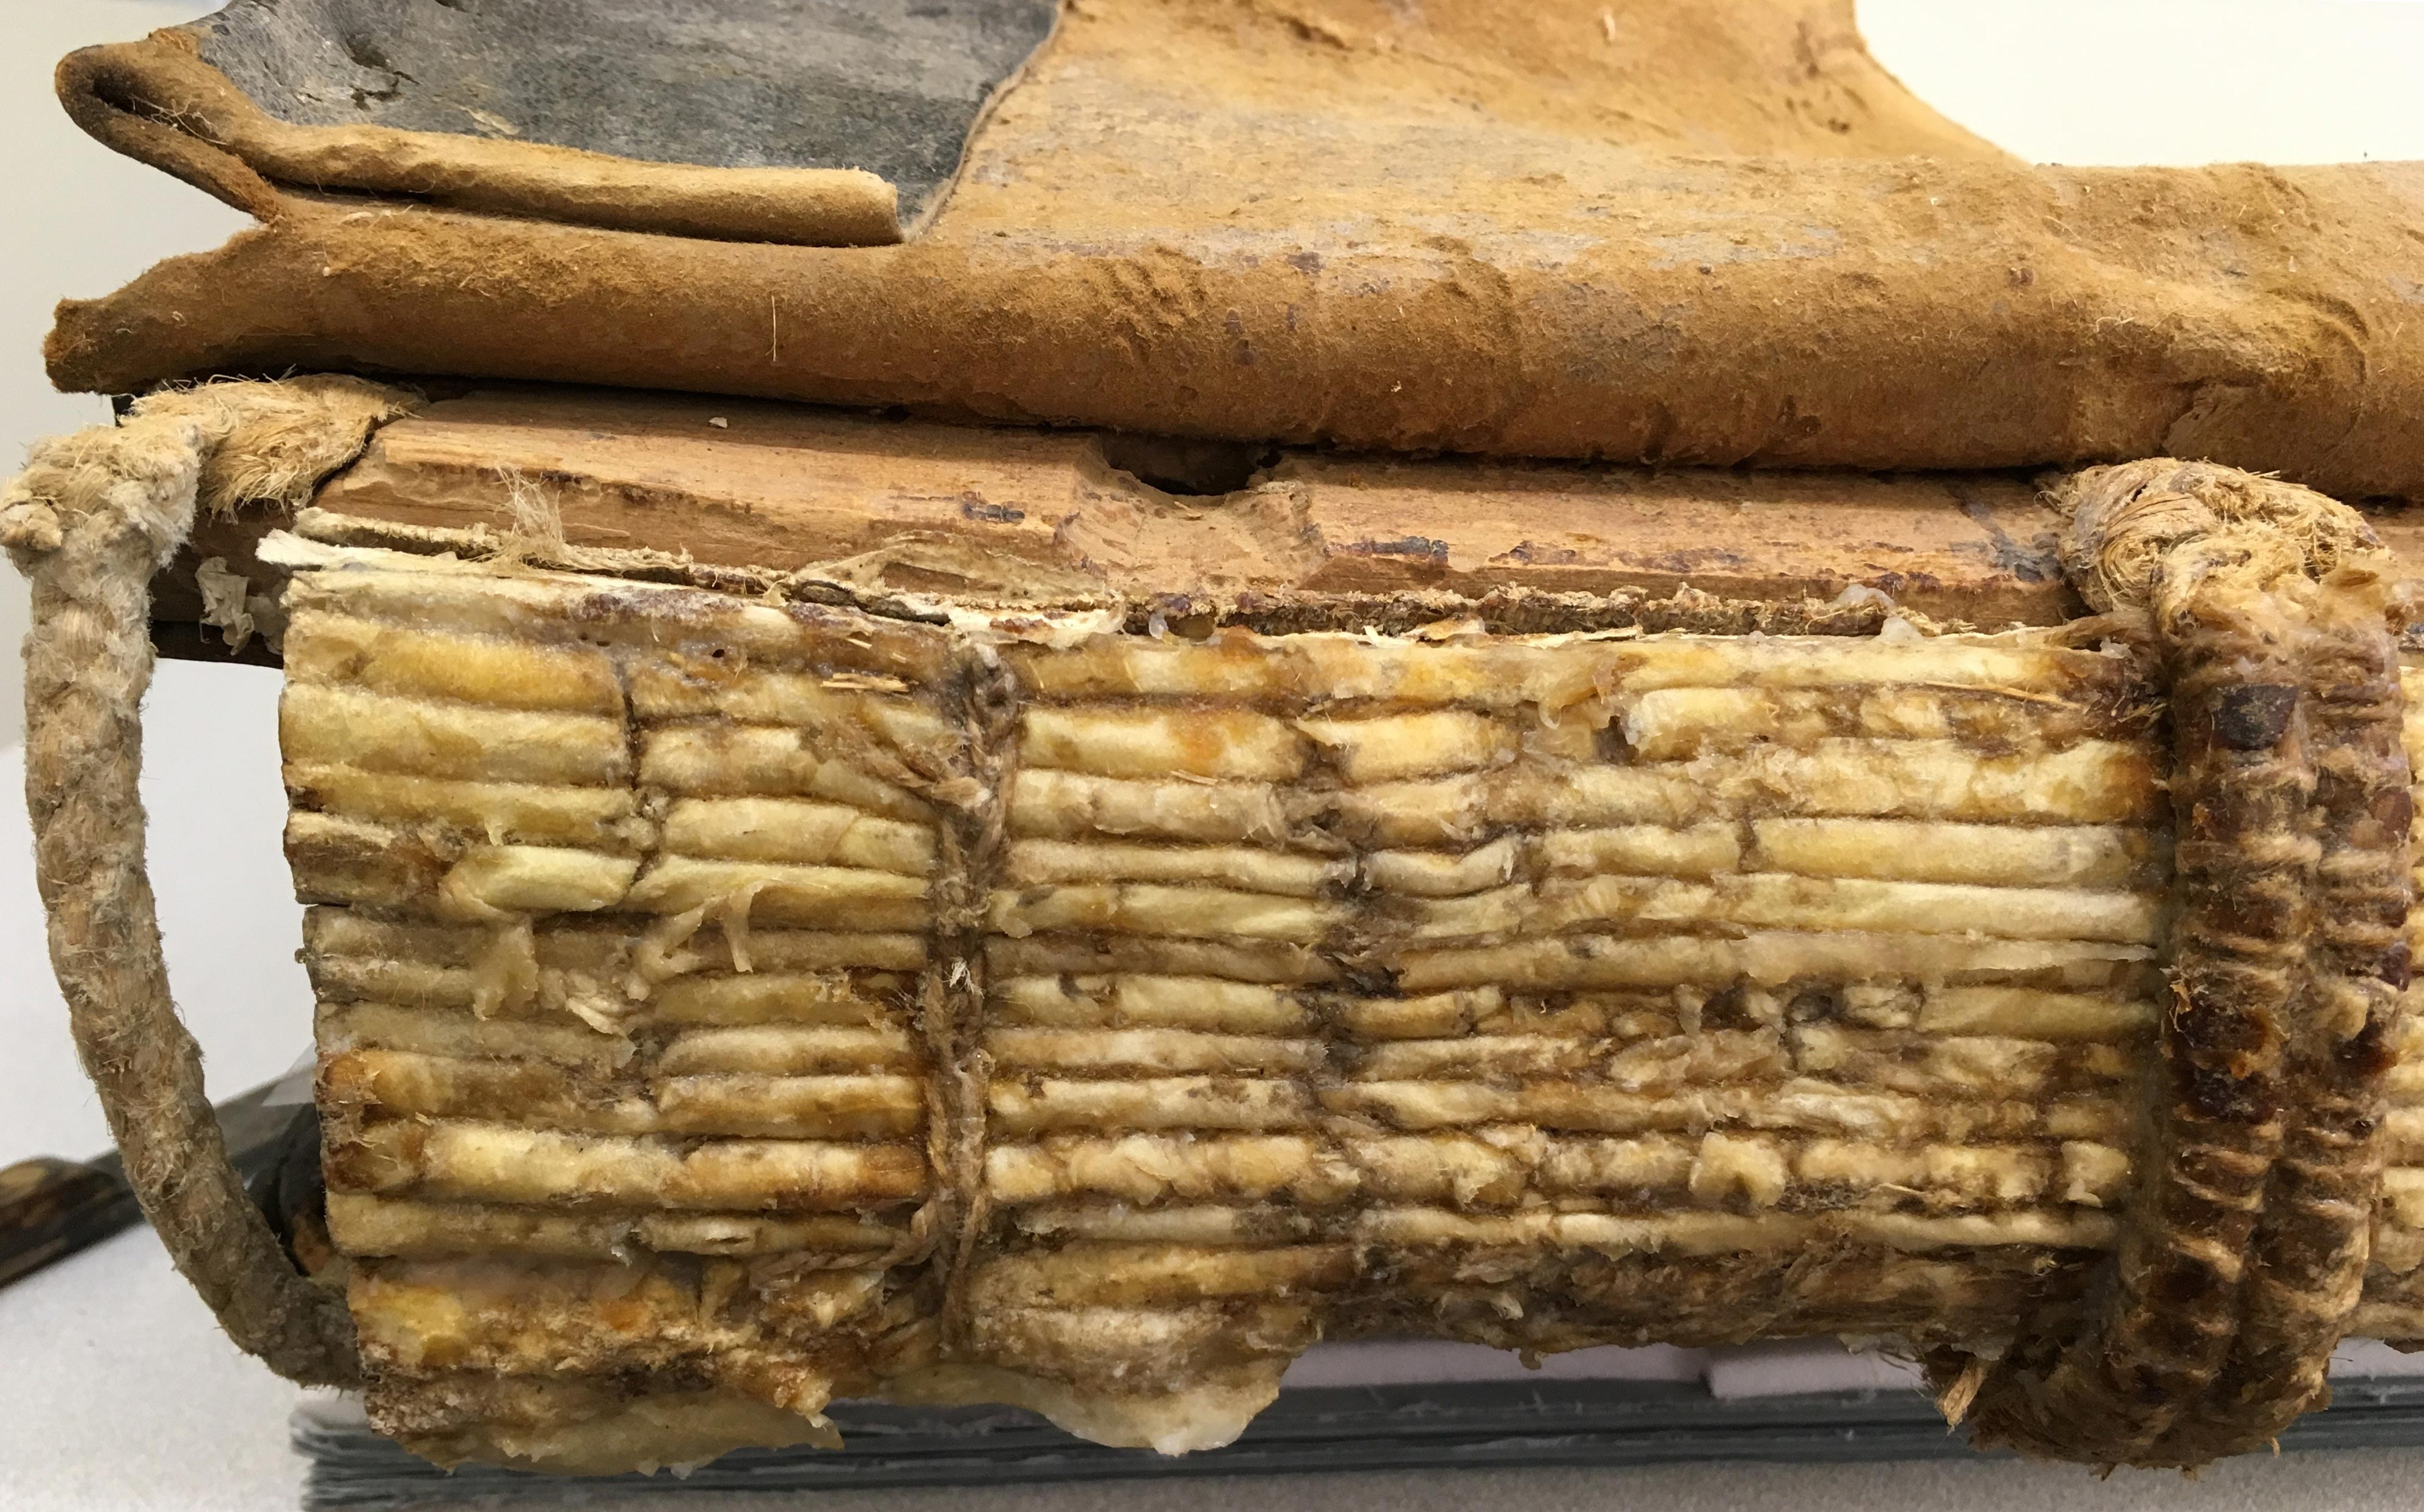
The book had had a previous spine reback, perhaps in the 1940s or 1950s, to judge by the materials and method used. The linings that had extended onto the boards had broken and were no longer offering a text-to-board attachment. In order to address this problem, conservators cut and lifted the leather from the lower board to expose the spine area. Using a poultice of wheat paste to soften the old glue, Deborah Howe removed the linings to expose the back of the quires.
Removal of the linings and adhesive revealed some older sewing stations (where the quires had been attached to the previous cords) and a different lacing area for the previous cords.
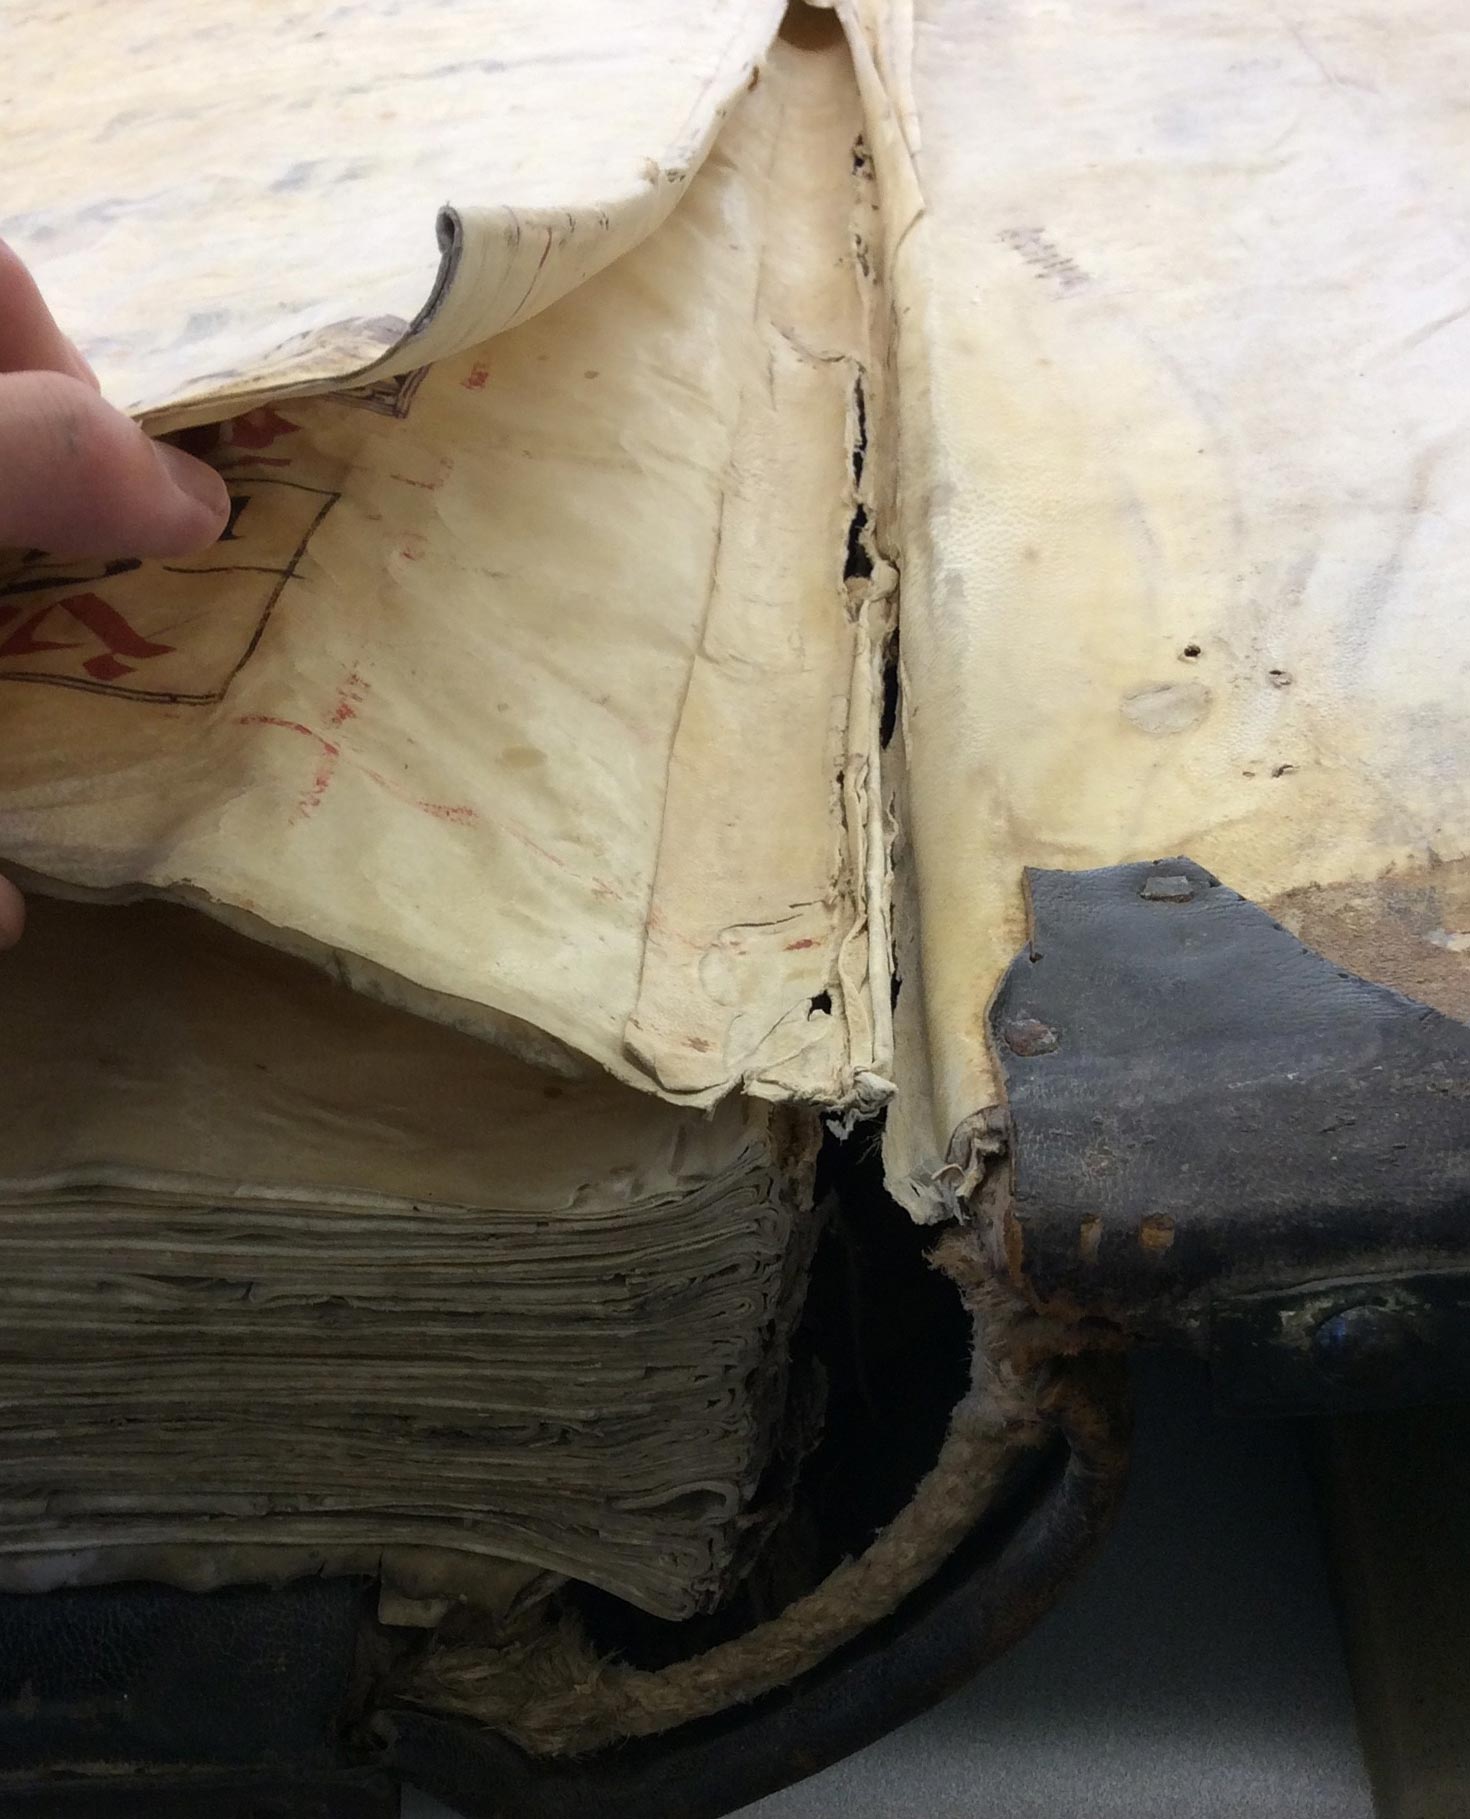
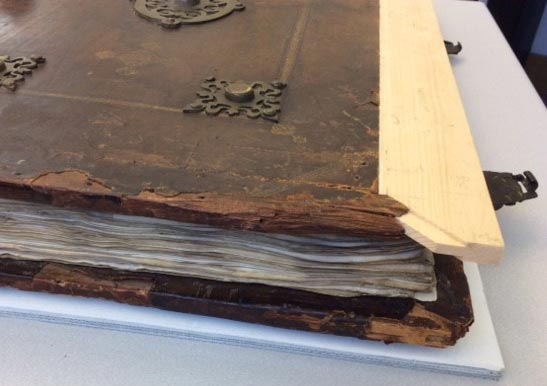
The quires had been sewn on double cords which were still attached and laced into the boards.The main area of damage was a large section of the lower board. At some point, the edge of the board had splintered off, taking with it the catch plates into which the clasps, attached to the upper board, had once been fastened to keep the book tightly closed and the pages lying flat.
Greg Elder, Director of the Dartmouth Student Woodworking Shop, helped fabricate an extension to replace the missing area of the lower board.
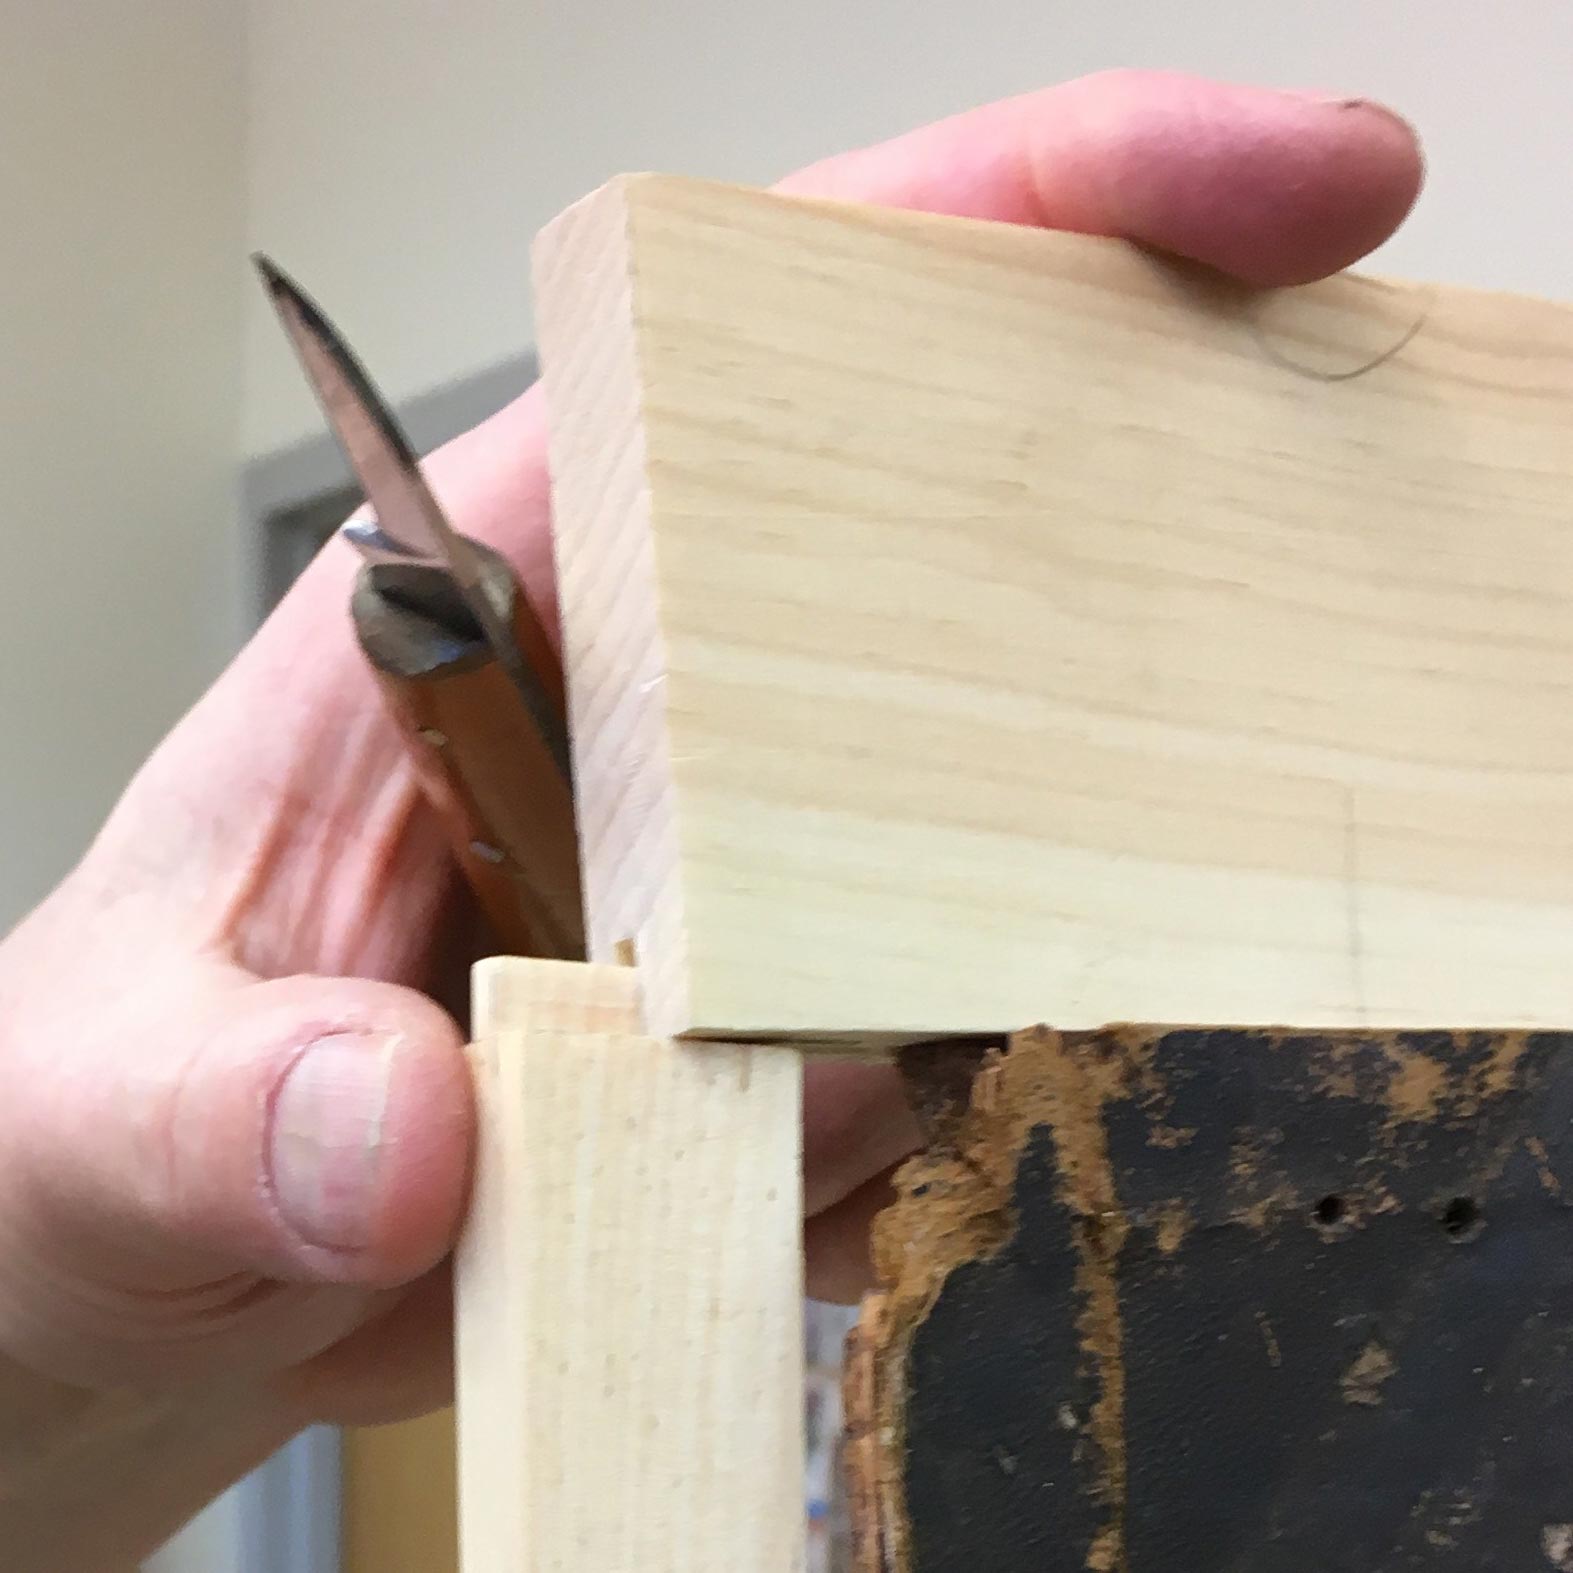
The broken edge of the lower board was an angled and jagged break. First, he clamped a narrow board onto the existing cover and used a router, guided by this straight edge, to cut a new straight and square surface to which he could attach an extension. He determined that the original manuscript boards were made of softwood, from a conifer such as pine or spruce. He chose eastern white pine as the repair material as it seemed very similar in density and texture to the original.
He glued the new addition to the fore-edge and held it in place with clamps. The hinge side of the board was rounded and fragile because of the holes for the binding; this made it impossible to clamp across the width of the board to hold the new wood against the old. Instead, he used wedges between the vertical clamp bar and the new wood to exert pressure.
The original boards had been constructed with breadboard ends. Greg Elder explains, “Boards tend to warp or cup across the grain, but not along the length. This happens because wood changes dimensions, in width and thickness, but not in length, with changes in relative humidity. So that means the cover is always changing dimension. The grain of the breadboard end runs along the cover’s width and since it tends to stay flat along its length, it holds the cover flat via the tongue and grooves. Tongue and grooves are used for two reasons: one, the end grain of a board cannot be glued to create a strong bond, and two, the cover is changing its width dimension with the seasons and the breadboard end stays the same length. Without the tongue and groove, they would be tearing each other apart.”
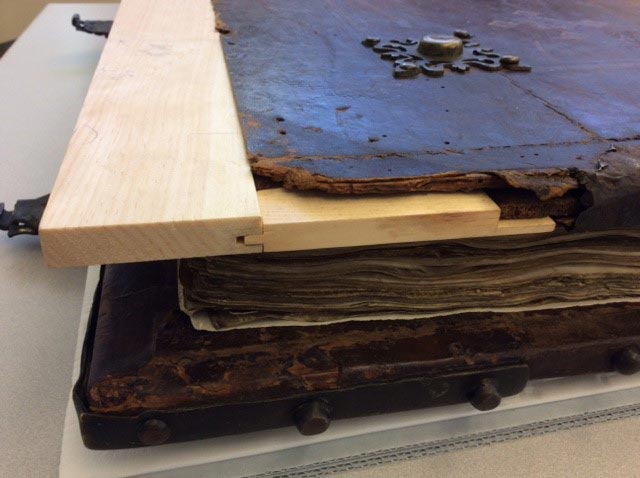
Greg Elder cut the upper corner of the extension to the lower board at a 45 degree angle, with a tongue to fit the remaining part of the original cover.
At the lower corner, the extension was cut at a 90 degree angle, with a groove. Once the extension was in place, Greg Elder created a fill piece with a tongue to fit the groove on the extension.
These pieces gave Deborah Howe the foundation she needed to fill in the remaining gaps in the board before the leather cover was applied.
The front and back endsheets of the book were missing. To protect the text block and provide a buffer at the front and back, new endsheets were fabricated from handmade paper. These were sewn onto the cords while the text block and loose quires were reinforced.
After the spine was cleaned, a layer of Japanese paper was used to reline the exposed quires. Once that dried, a layer of tight woven cotton was applied with extensions that attach onto the boards. Both the new endsheets and the refabricated endbands were sewn through the cotton lining.
After the endbands were sewn through the cotton lining, the cord was laced into the board. Note the previous hole used for the lacing.
The primary endband is structural; it is anchored into the text block and secures the cord that is laced into the wooden board. The leather secondary endband is decorative.
The strap for the upper clasp was broken, so a strip of vellum was inserted inside the strap to reinforce it.
Once all the linings and text block consolidation were complete, the lifted leather spine was reattached. Ace bandages stabilized the re-adhered leather while drying.
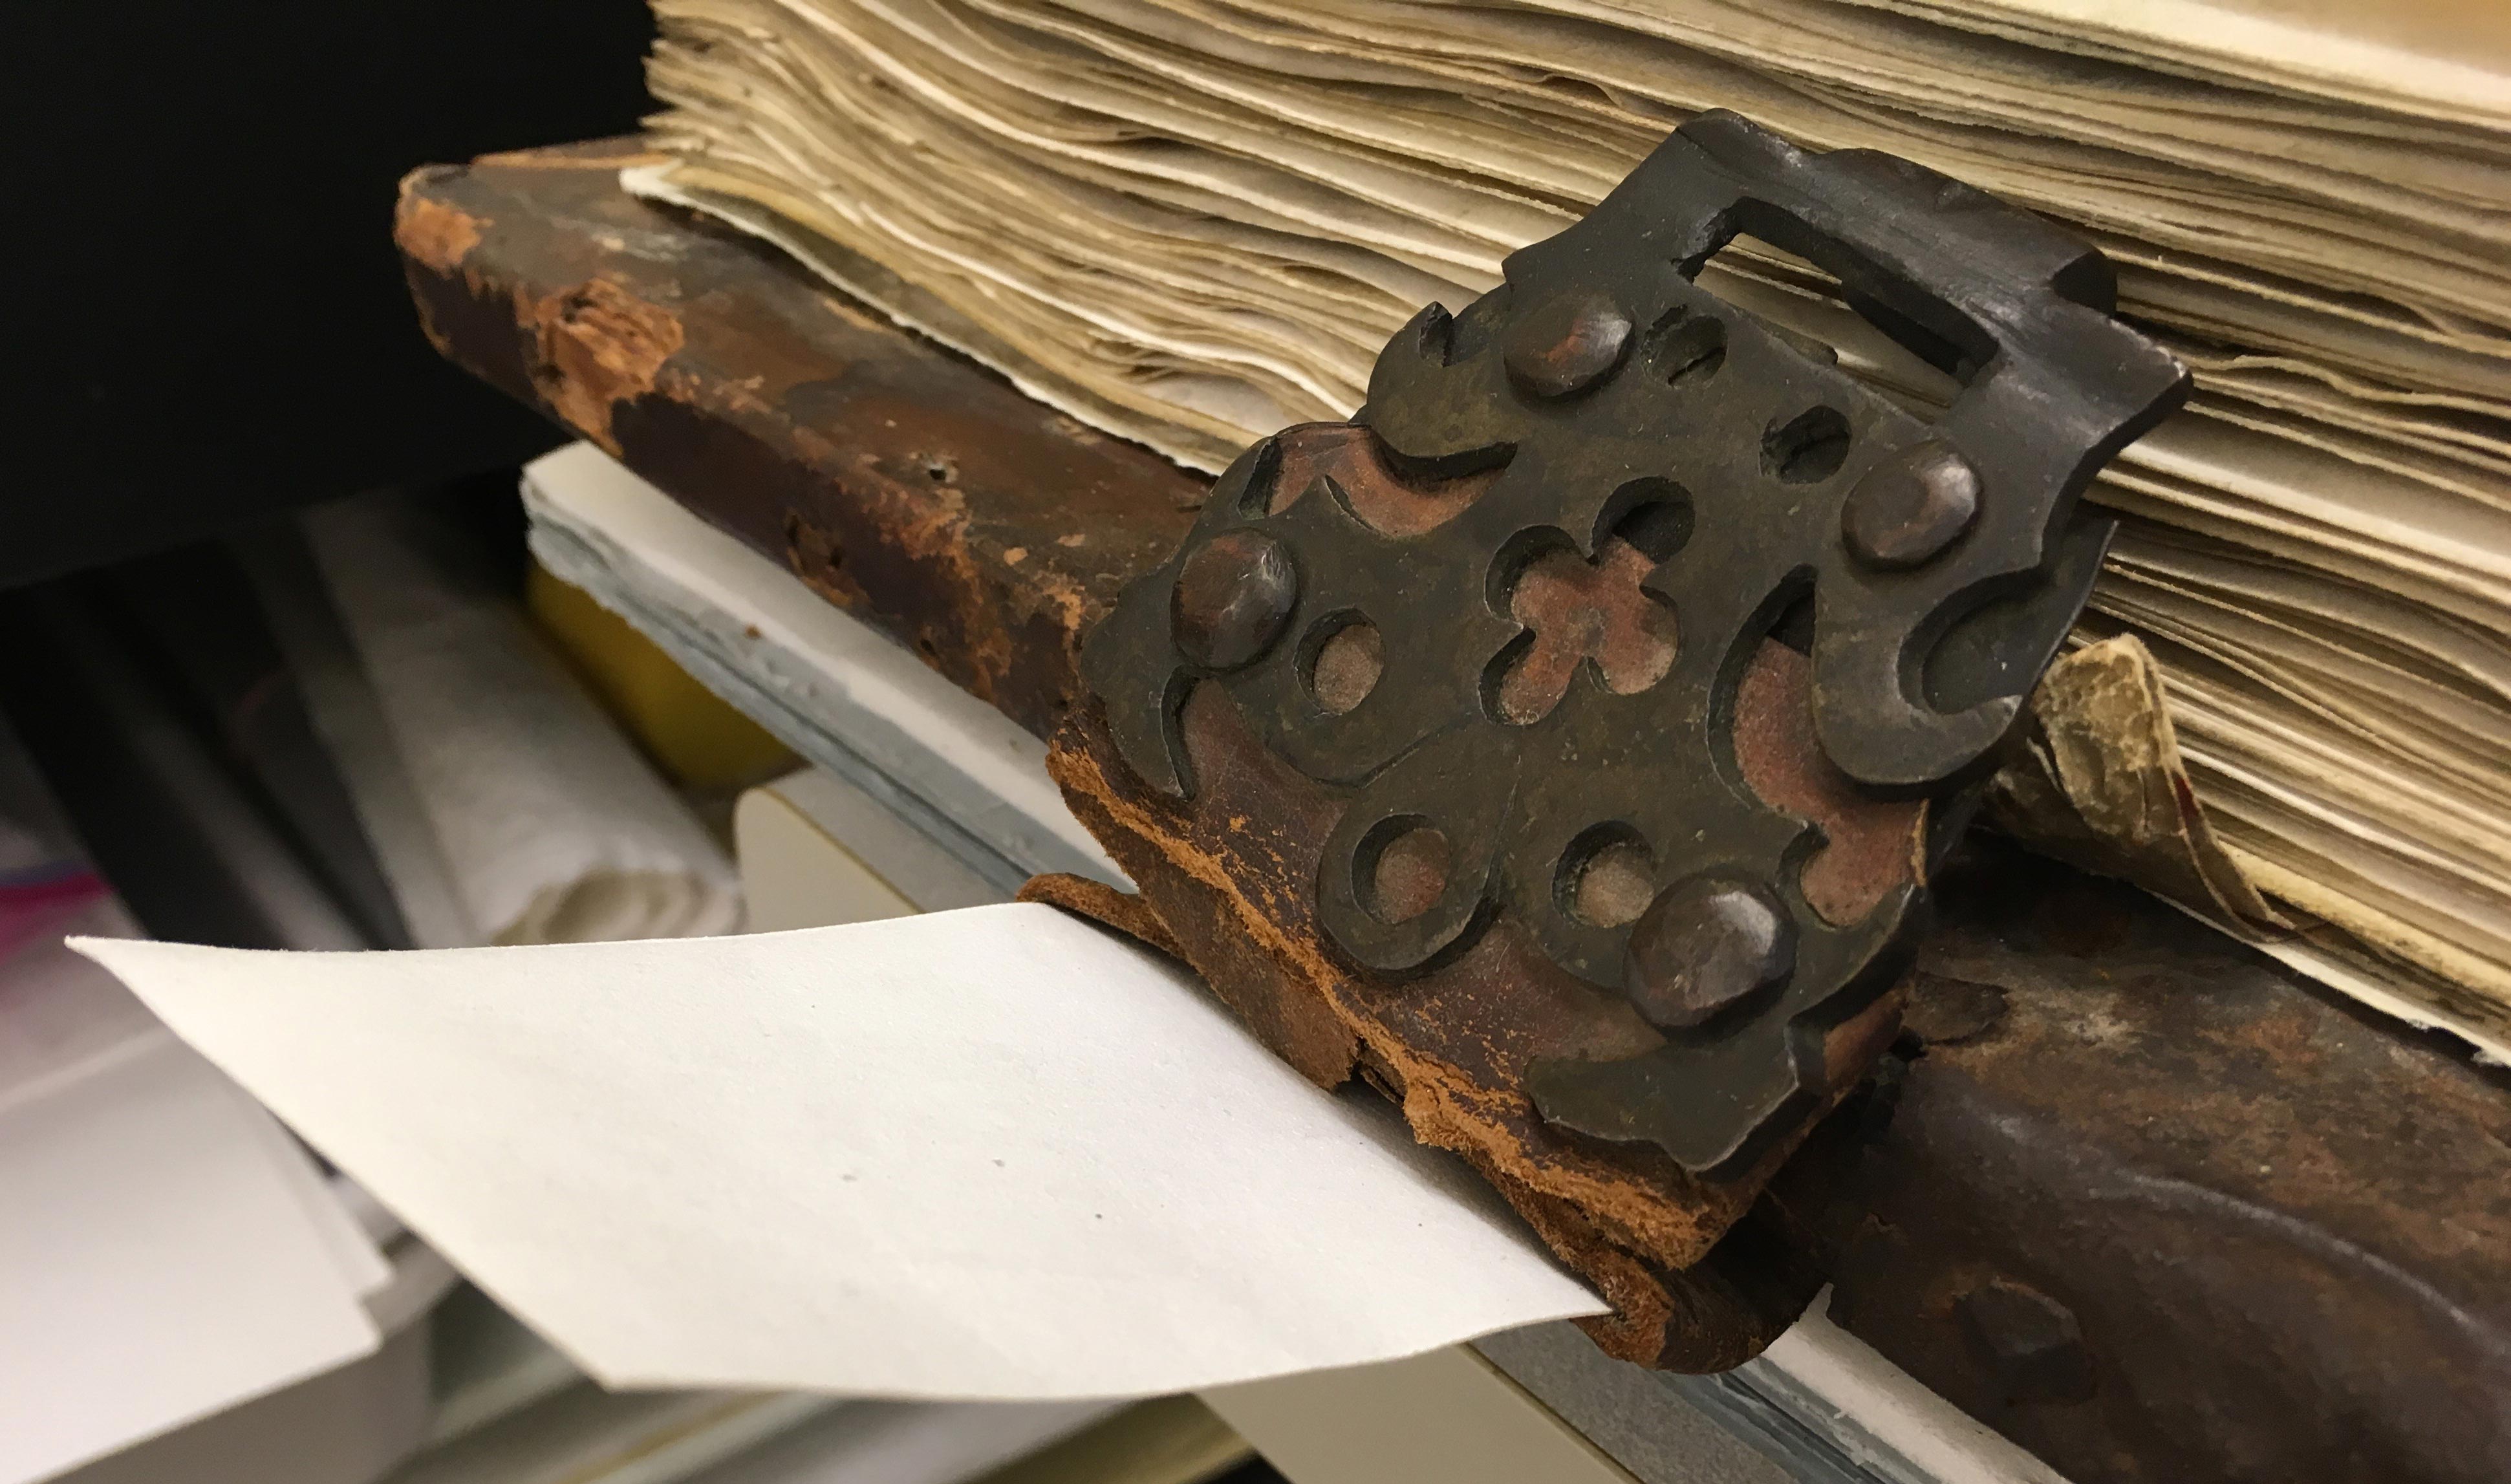
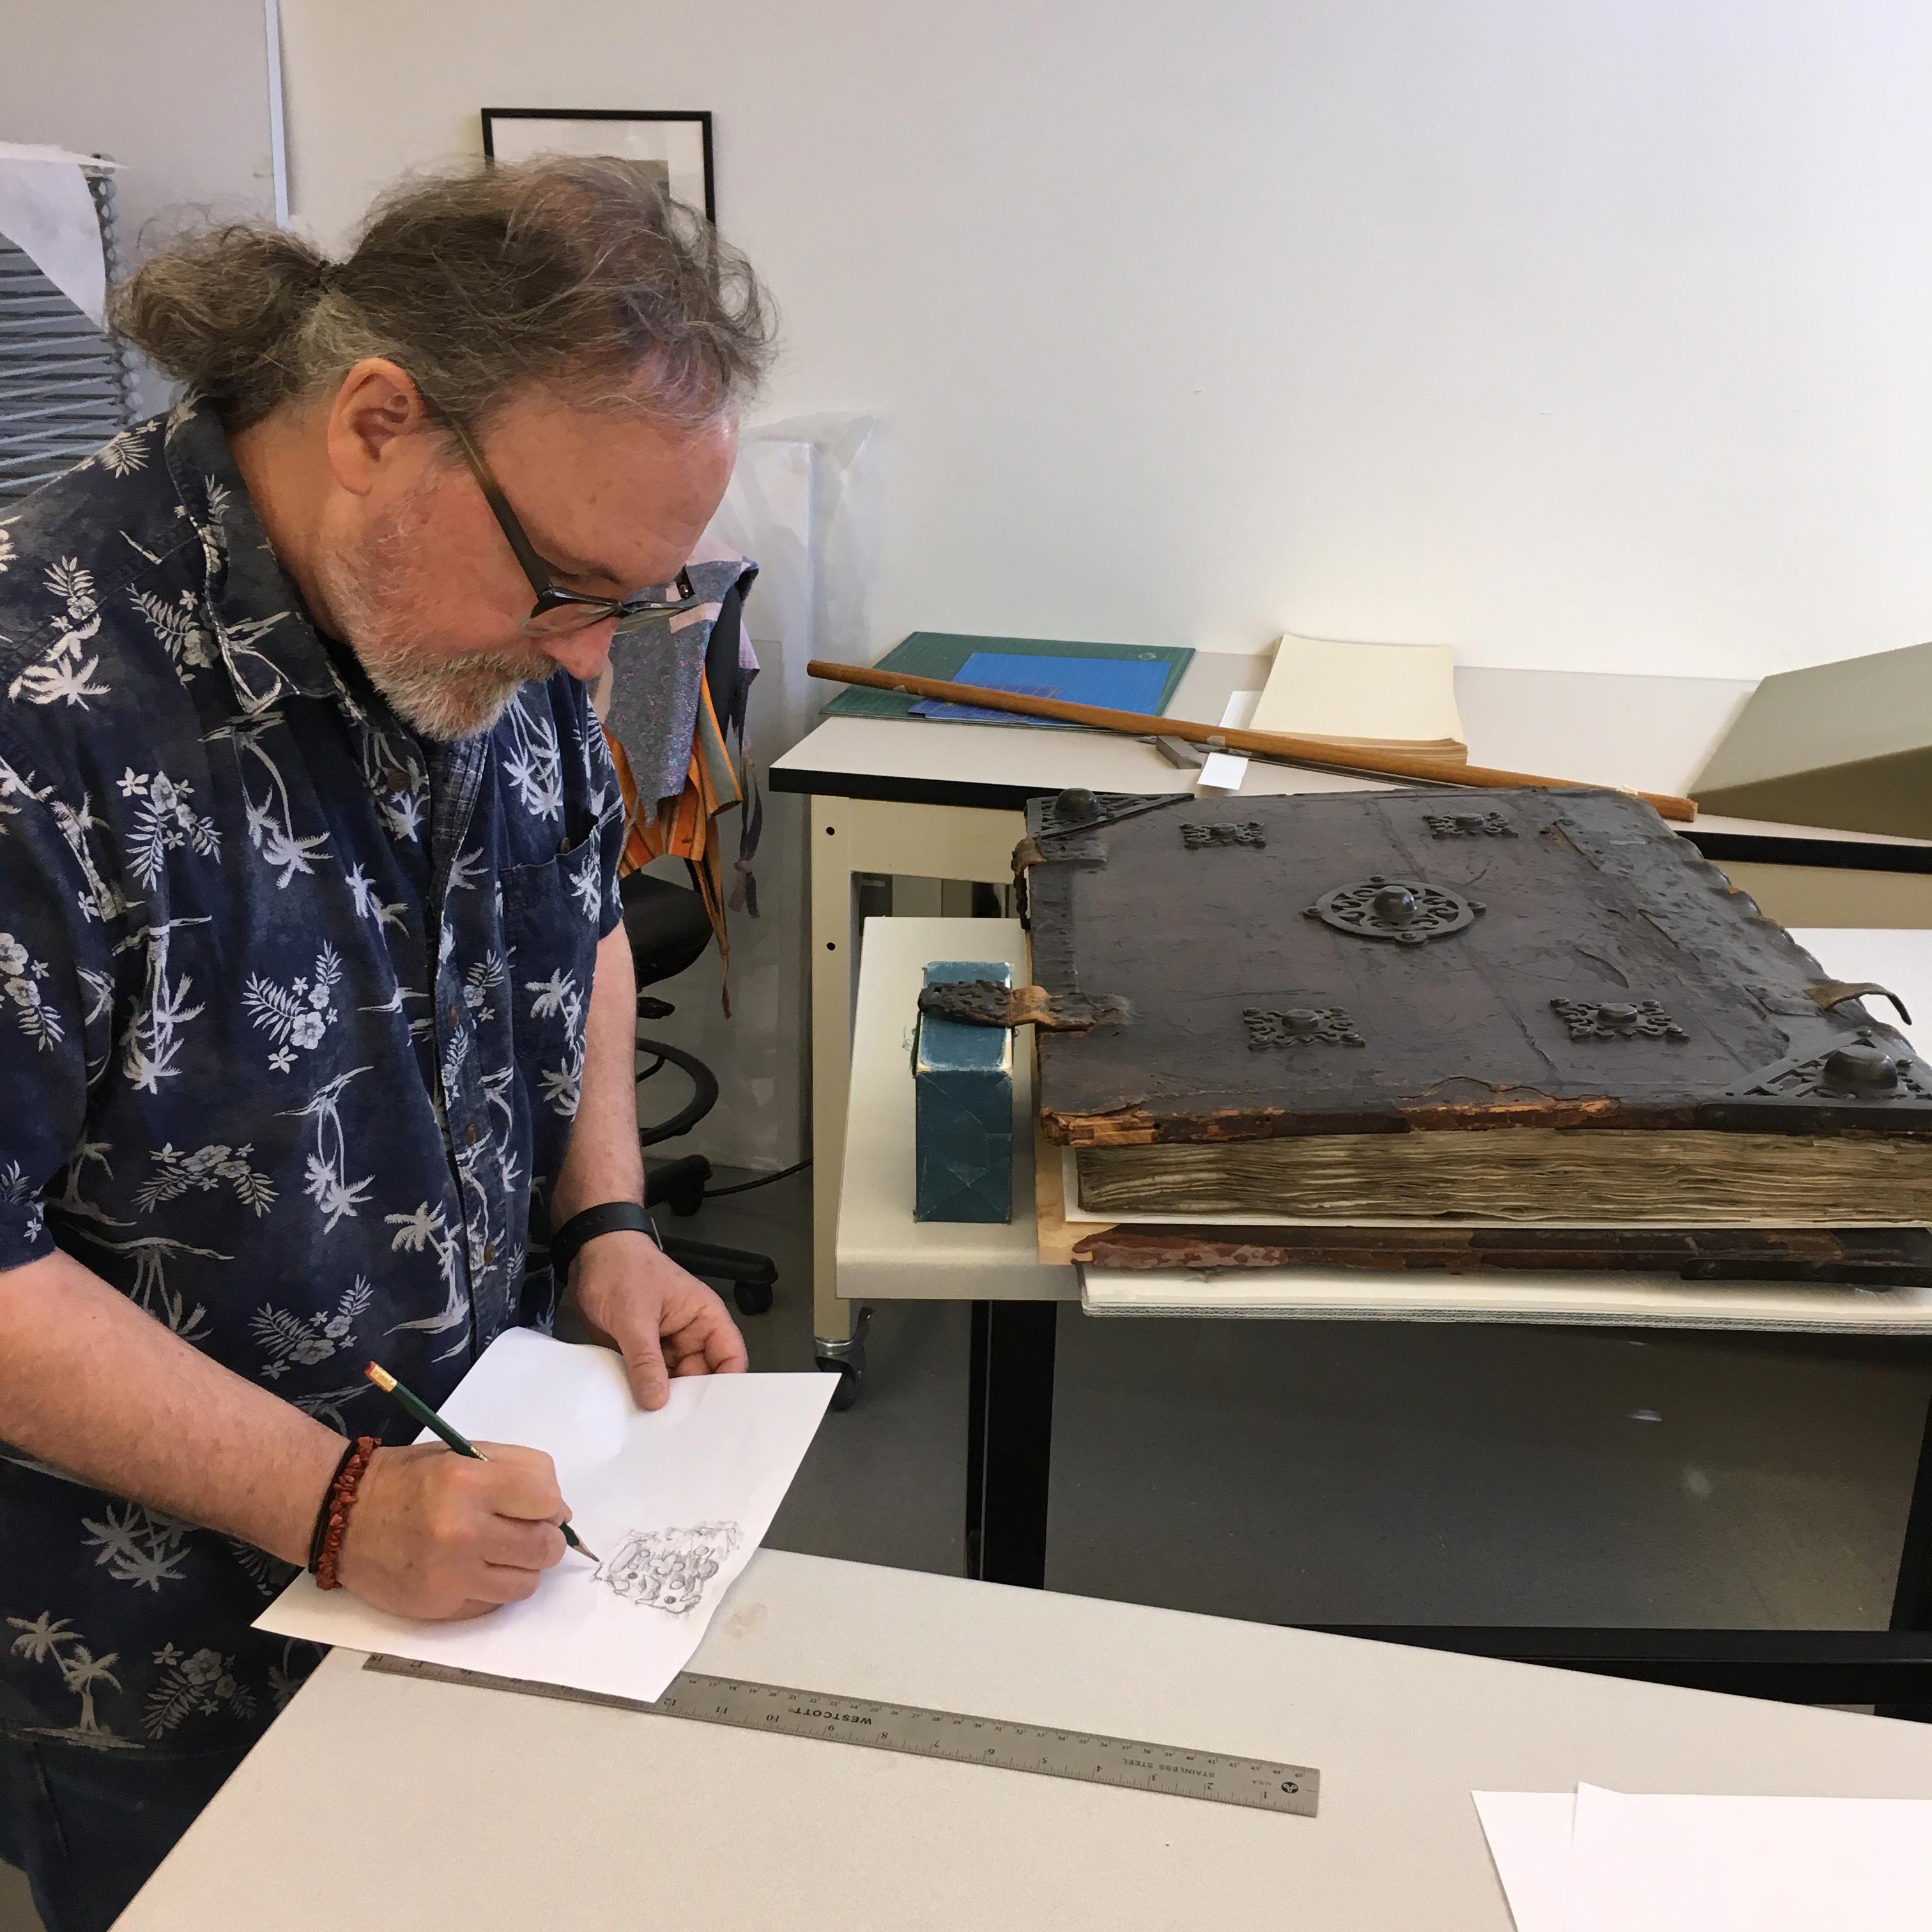
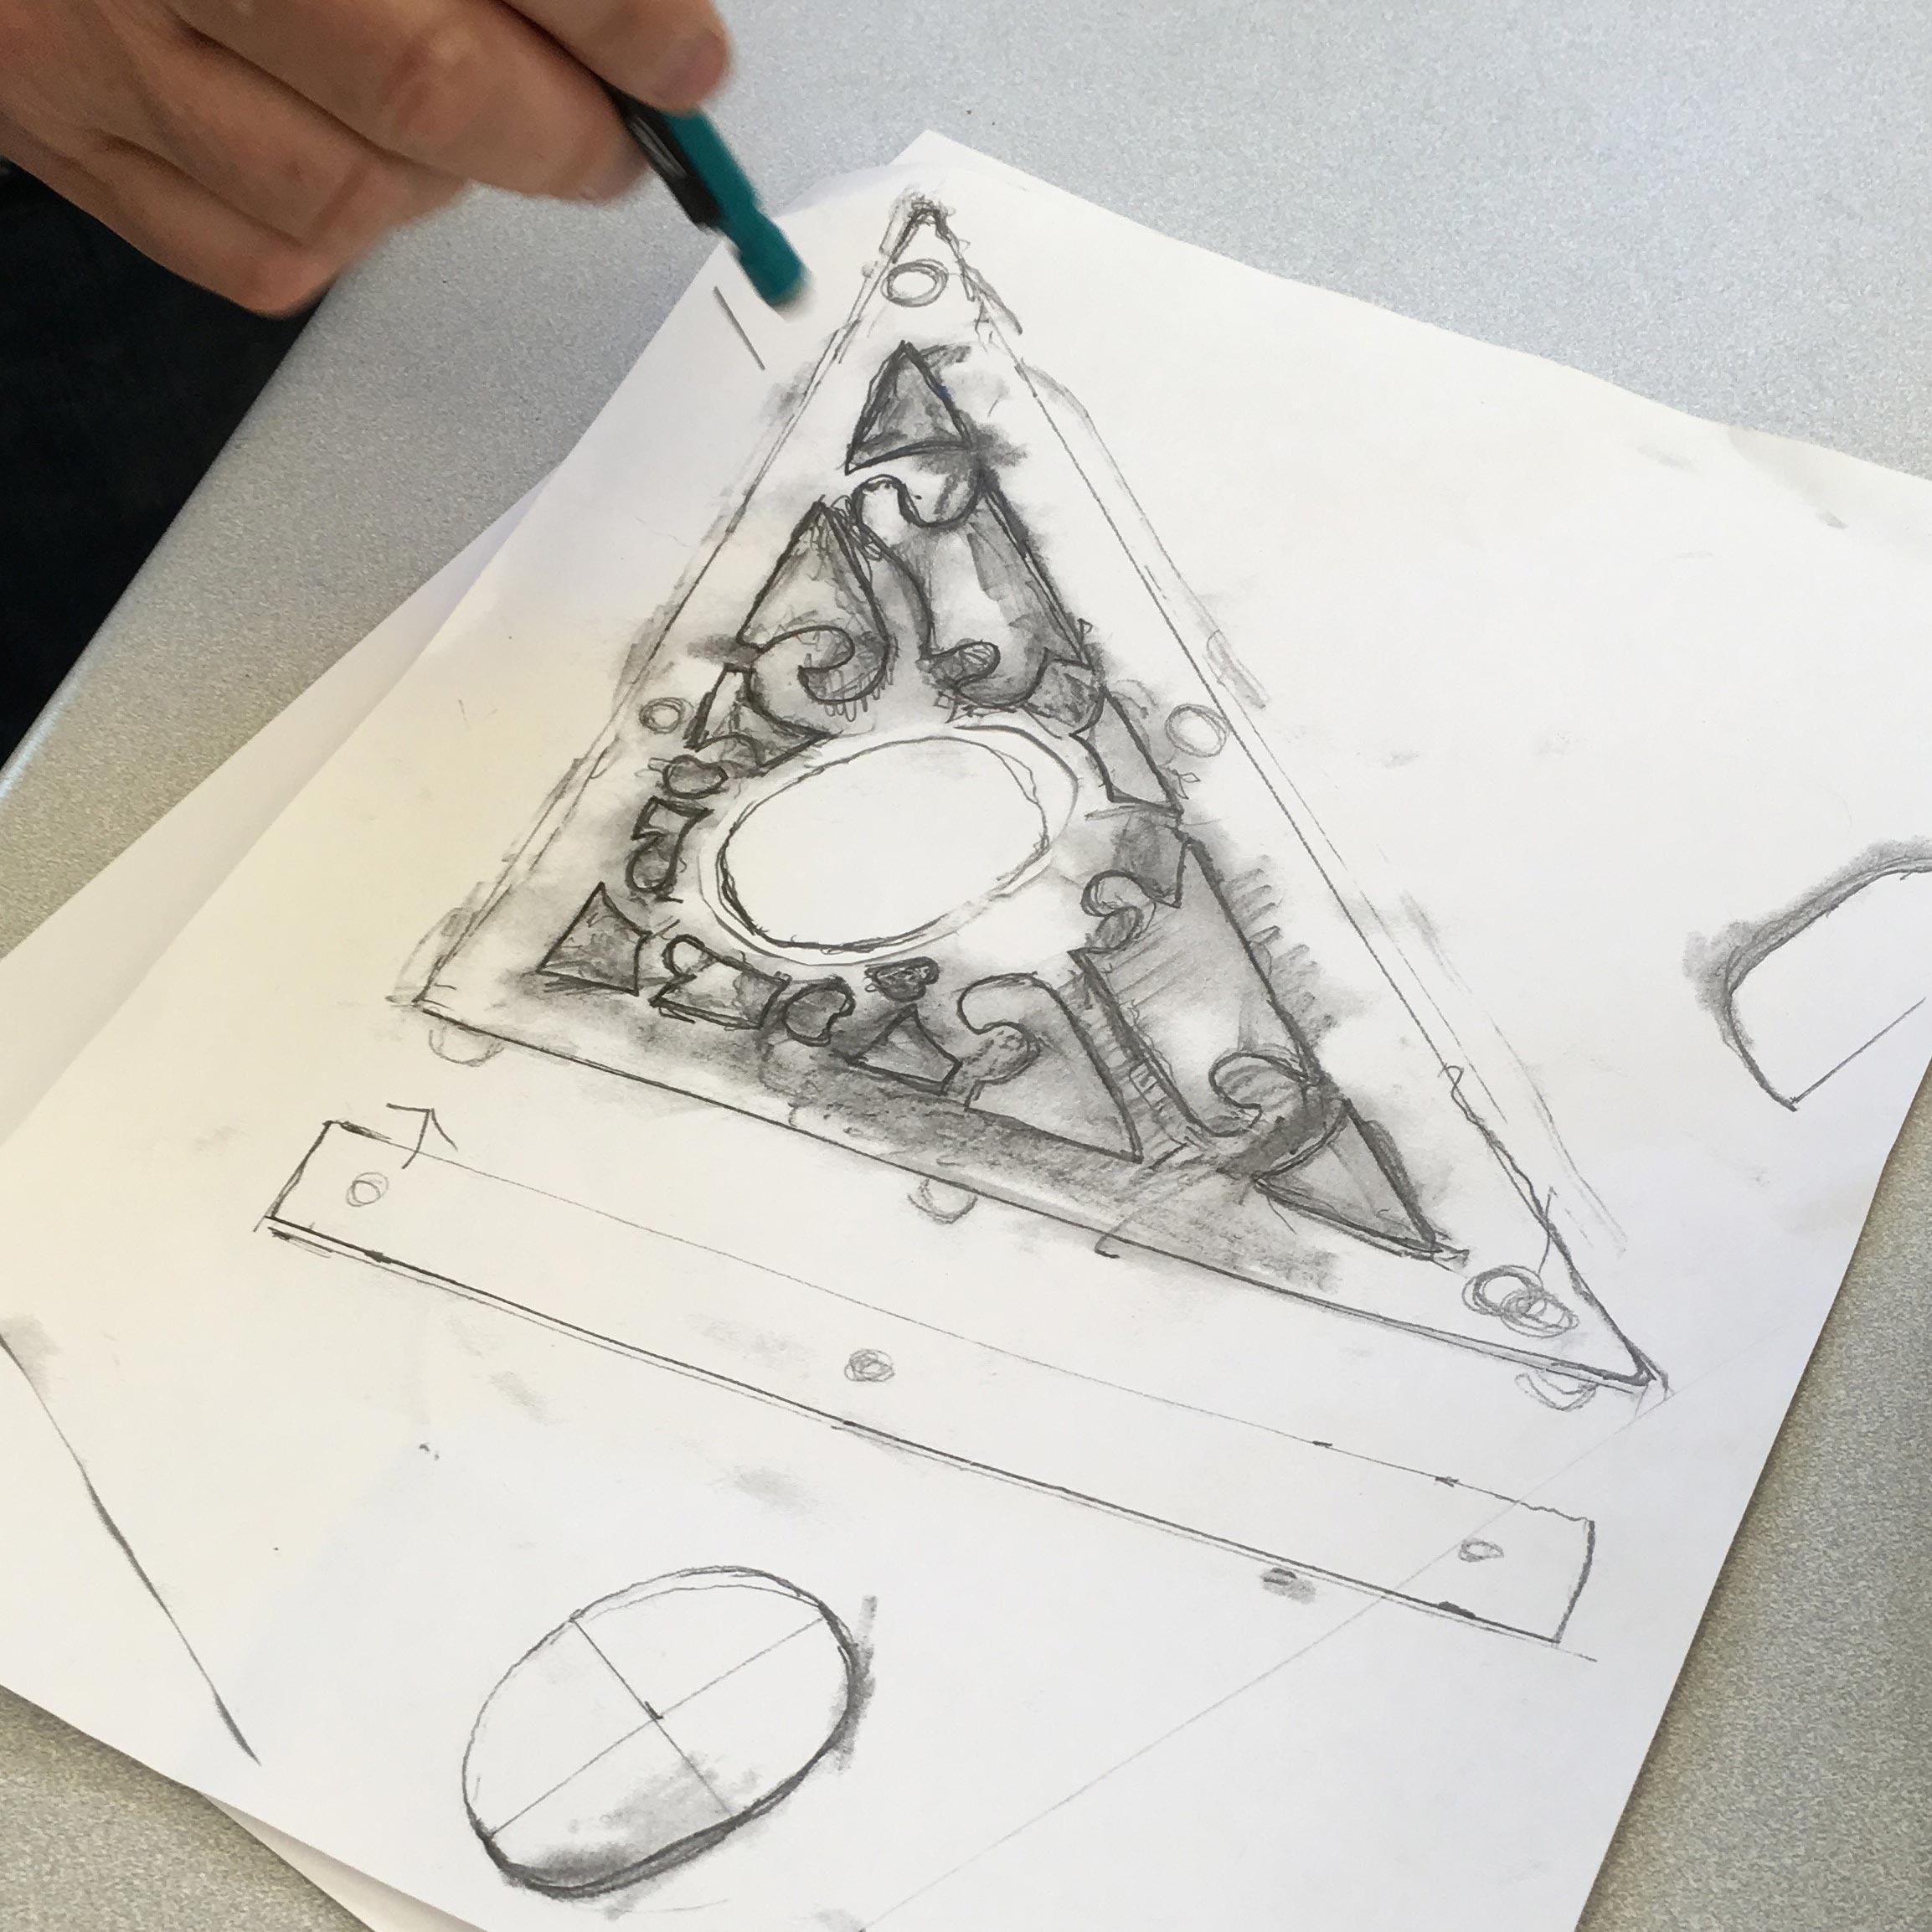
The antiphoner was missing two of the original bossed metal corners on the upper board, as well as three bossed metal corners and the two catch plates on the lower board. Jeff Georgantes from Dartmouth’s Claflin Jewelry Studio helped to fabricate new corners and catch plates.
He describes the process:
“First, we made a tracing of the existing parts with pencil and paper to get a fairly accurate outline. Then we manually refined the pattern with tracing paper and a fine point marker. From there we had an accurate template from which to cut out the new parts.
The original furnishings were made of bronze, but as 1/8-inch sheet bronze was not available, we substituted sheet brass. Brass and bronze are very similar, although bronze is redder and brass is more yellow. After attaching the templates, we cut out the shapes with a variety of metal cutting saws. Then using files and sandpaper we refined the shapes. From there we drilled holes and fabricated some raised shapes on the parts that we soldered into position.
Finally, to make the brass look more like the original aged bronze, we copper-plated the new parts and oxidized them with a sulphur solution.”
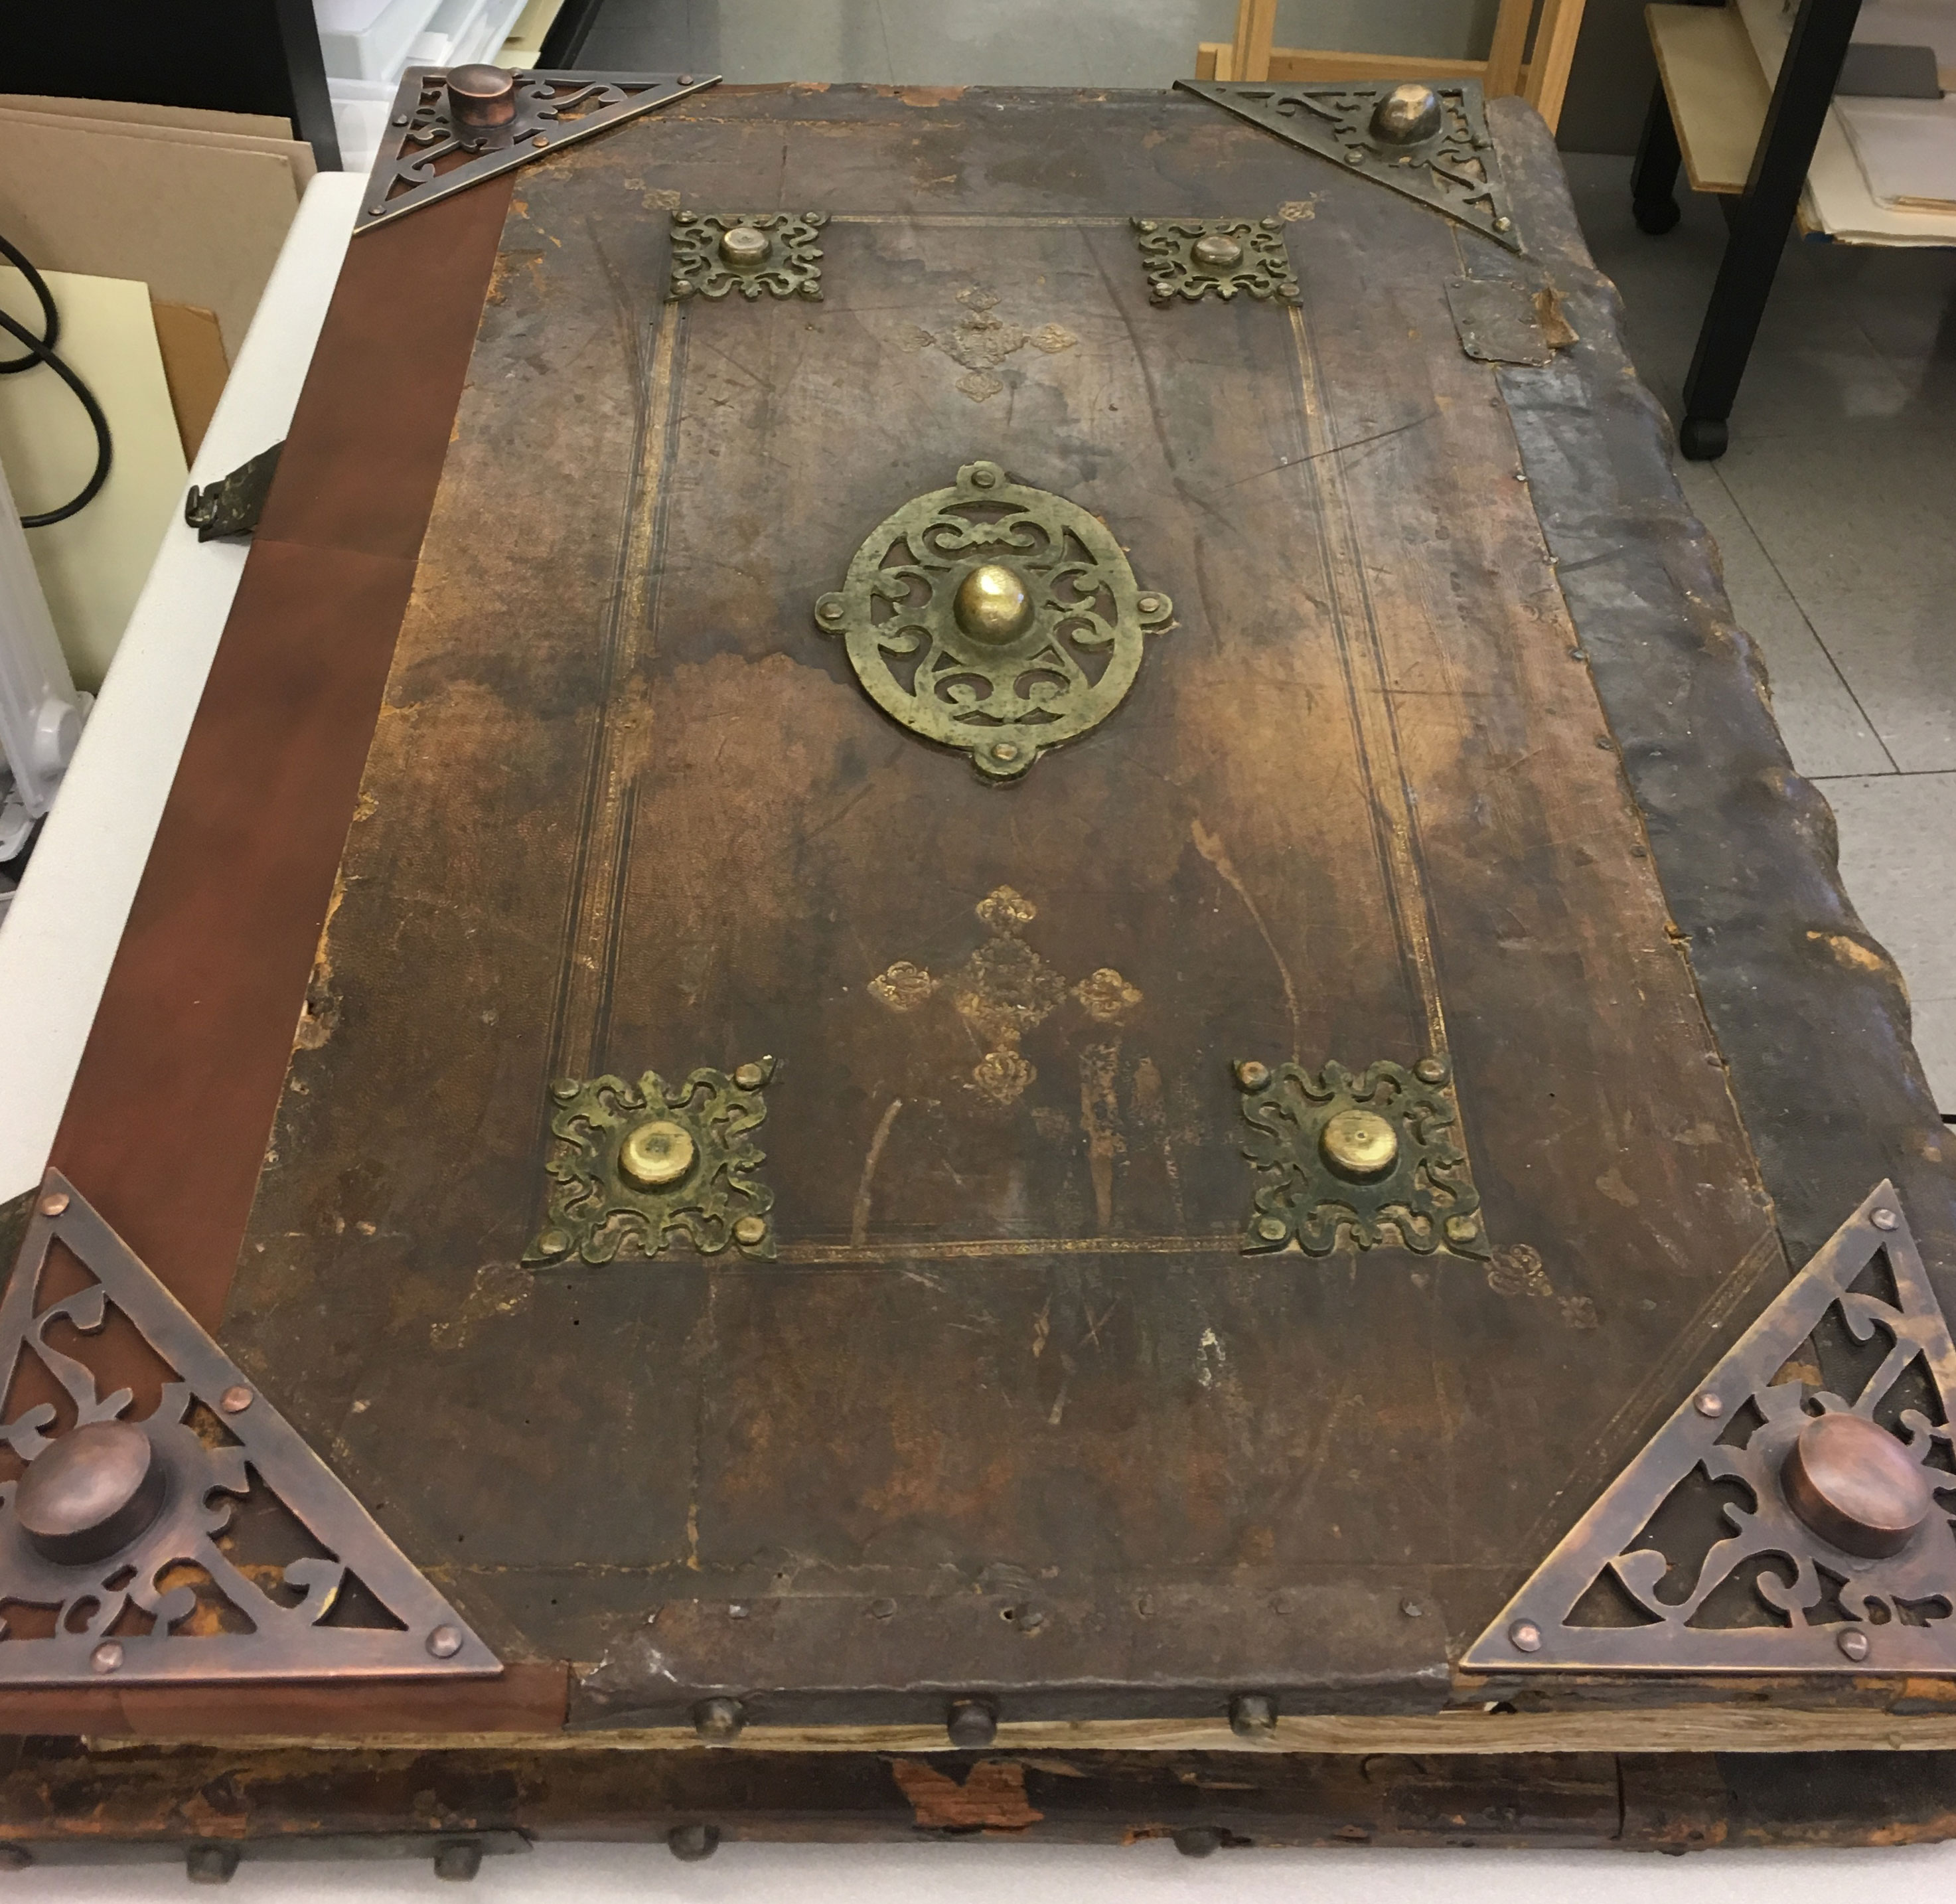
Here you can see the finished upper board, with two new bossed metal corners, and the finished lower board, with new leather covering the repair to the board and 3 new bossed metal corners.
Finally, the new catch plates were attached to the new leather-covered extension to the lower board.
In this final view of the book, you can see the repaired upper board and the metal clasps at the fore-edge, fastened into the new catch plates.
This page references:
- Image Rauner 003203 Conservation 04
- Image Rauner 003203 Conservation 15
- Image Rauner 003203 Conservation 27
- Image Rauner 003203 Conservation 05
- Image Rauner 003203 Conservation 16
- Image Rauner 003203 Conservation 28
- Image Rauner 003203 Conservation 06
- Image Rauner 003203 Conservation 17
- Image Rauner 003203 Conservation 07
- Image Rauner 003203 Conservation 18
- Image Rauner 003203 Conservation 08
- Image Rauner 003203 Conservation 19
- Image Rauner 003203 Conservation 09
- Image Rauner 003203 Conservation 20
- Image Rauner 003203 Conservation 10
- Image Rauner 003203 Conservation 21
- Image Rauner 003203 Conservation 11
- Image Rauner 003203 Conservation 22
- Image Rauner 003203 Conservation 01
- Image Rauner 003203 Conservation 12
- Image Rauner 003203 Conservation 23
- Image Rauner 003203 Conservation 03
- Image Rauner 003203 Conservation 13
- Image Rauner 003203 Conservation 24
- Image Rauner 003203 Conservation 02
- Image Rauner 003203 Conservation 14
- Image Rauner 003203 Conservation 25